I still can’t believe we put this one off for so long!
It’s been just over 2 years since we moved into this 1979 house, and from the first moment I laid eyes on this eyesore of a bathroom, I’ve been itching to do something about it. We’d held off on renovations because we wanted to knock out walls and move plumbing and do a complete rework of the floorplan.
And then, on the eve of my Spring Break, we (and by we, of course I mean me) just decided not to wait anymore. Instead of a giant project, I knew I could do a lot to make it look like a million bucks without spending a fortune.
If you’d like to know how we turned a hideous eyesore into a moody sanctuary for less than $800 with the help of Amazon and Home Depot, keep on scrolling…
And, may I just say, if you’ve ever even THOUGHT about doing something like this in your own home, I’m here to tell you that you absolutely CAN! I’m going to step you through our process and I’m going to give you the links to everything we used to create this breathtaking space. (Since I am an Amazon affiliate, I may earn a small commission from qualified purchases, but that in no way affects the price you pay for these items.)
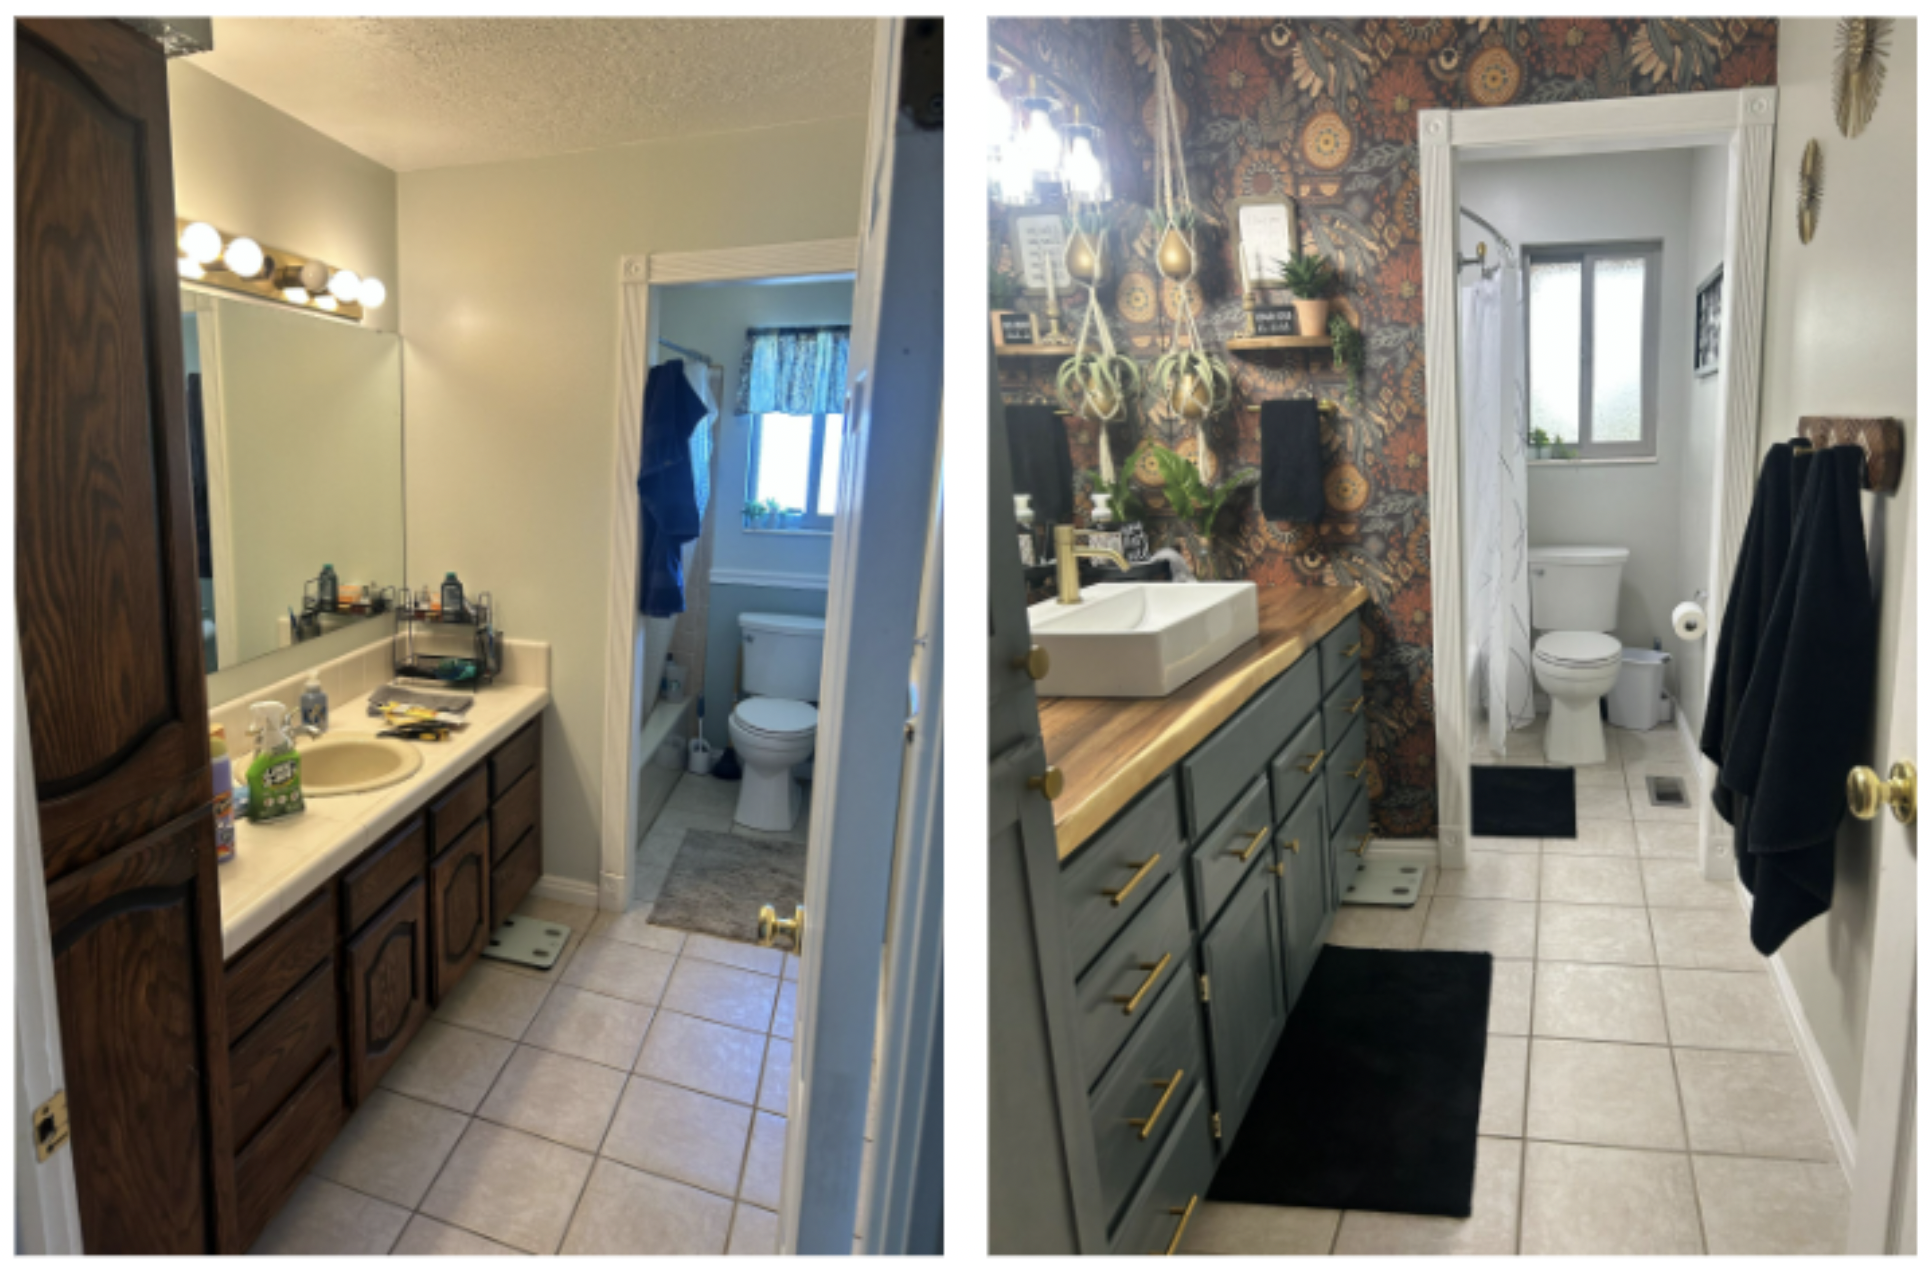
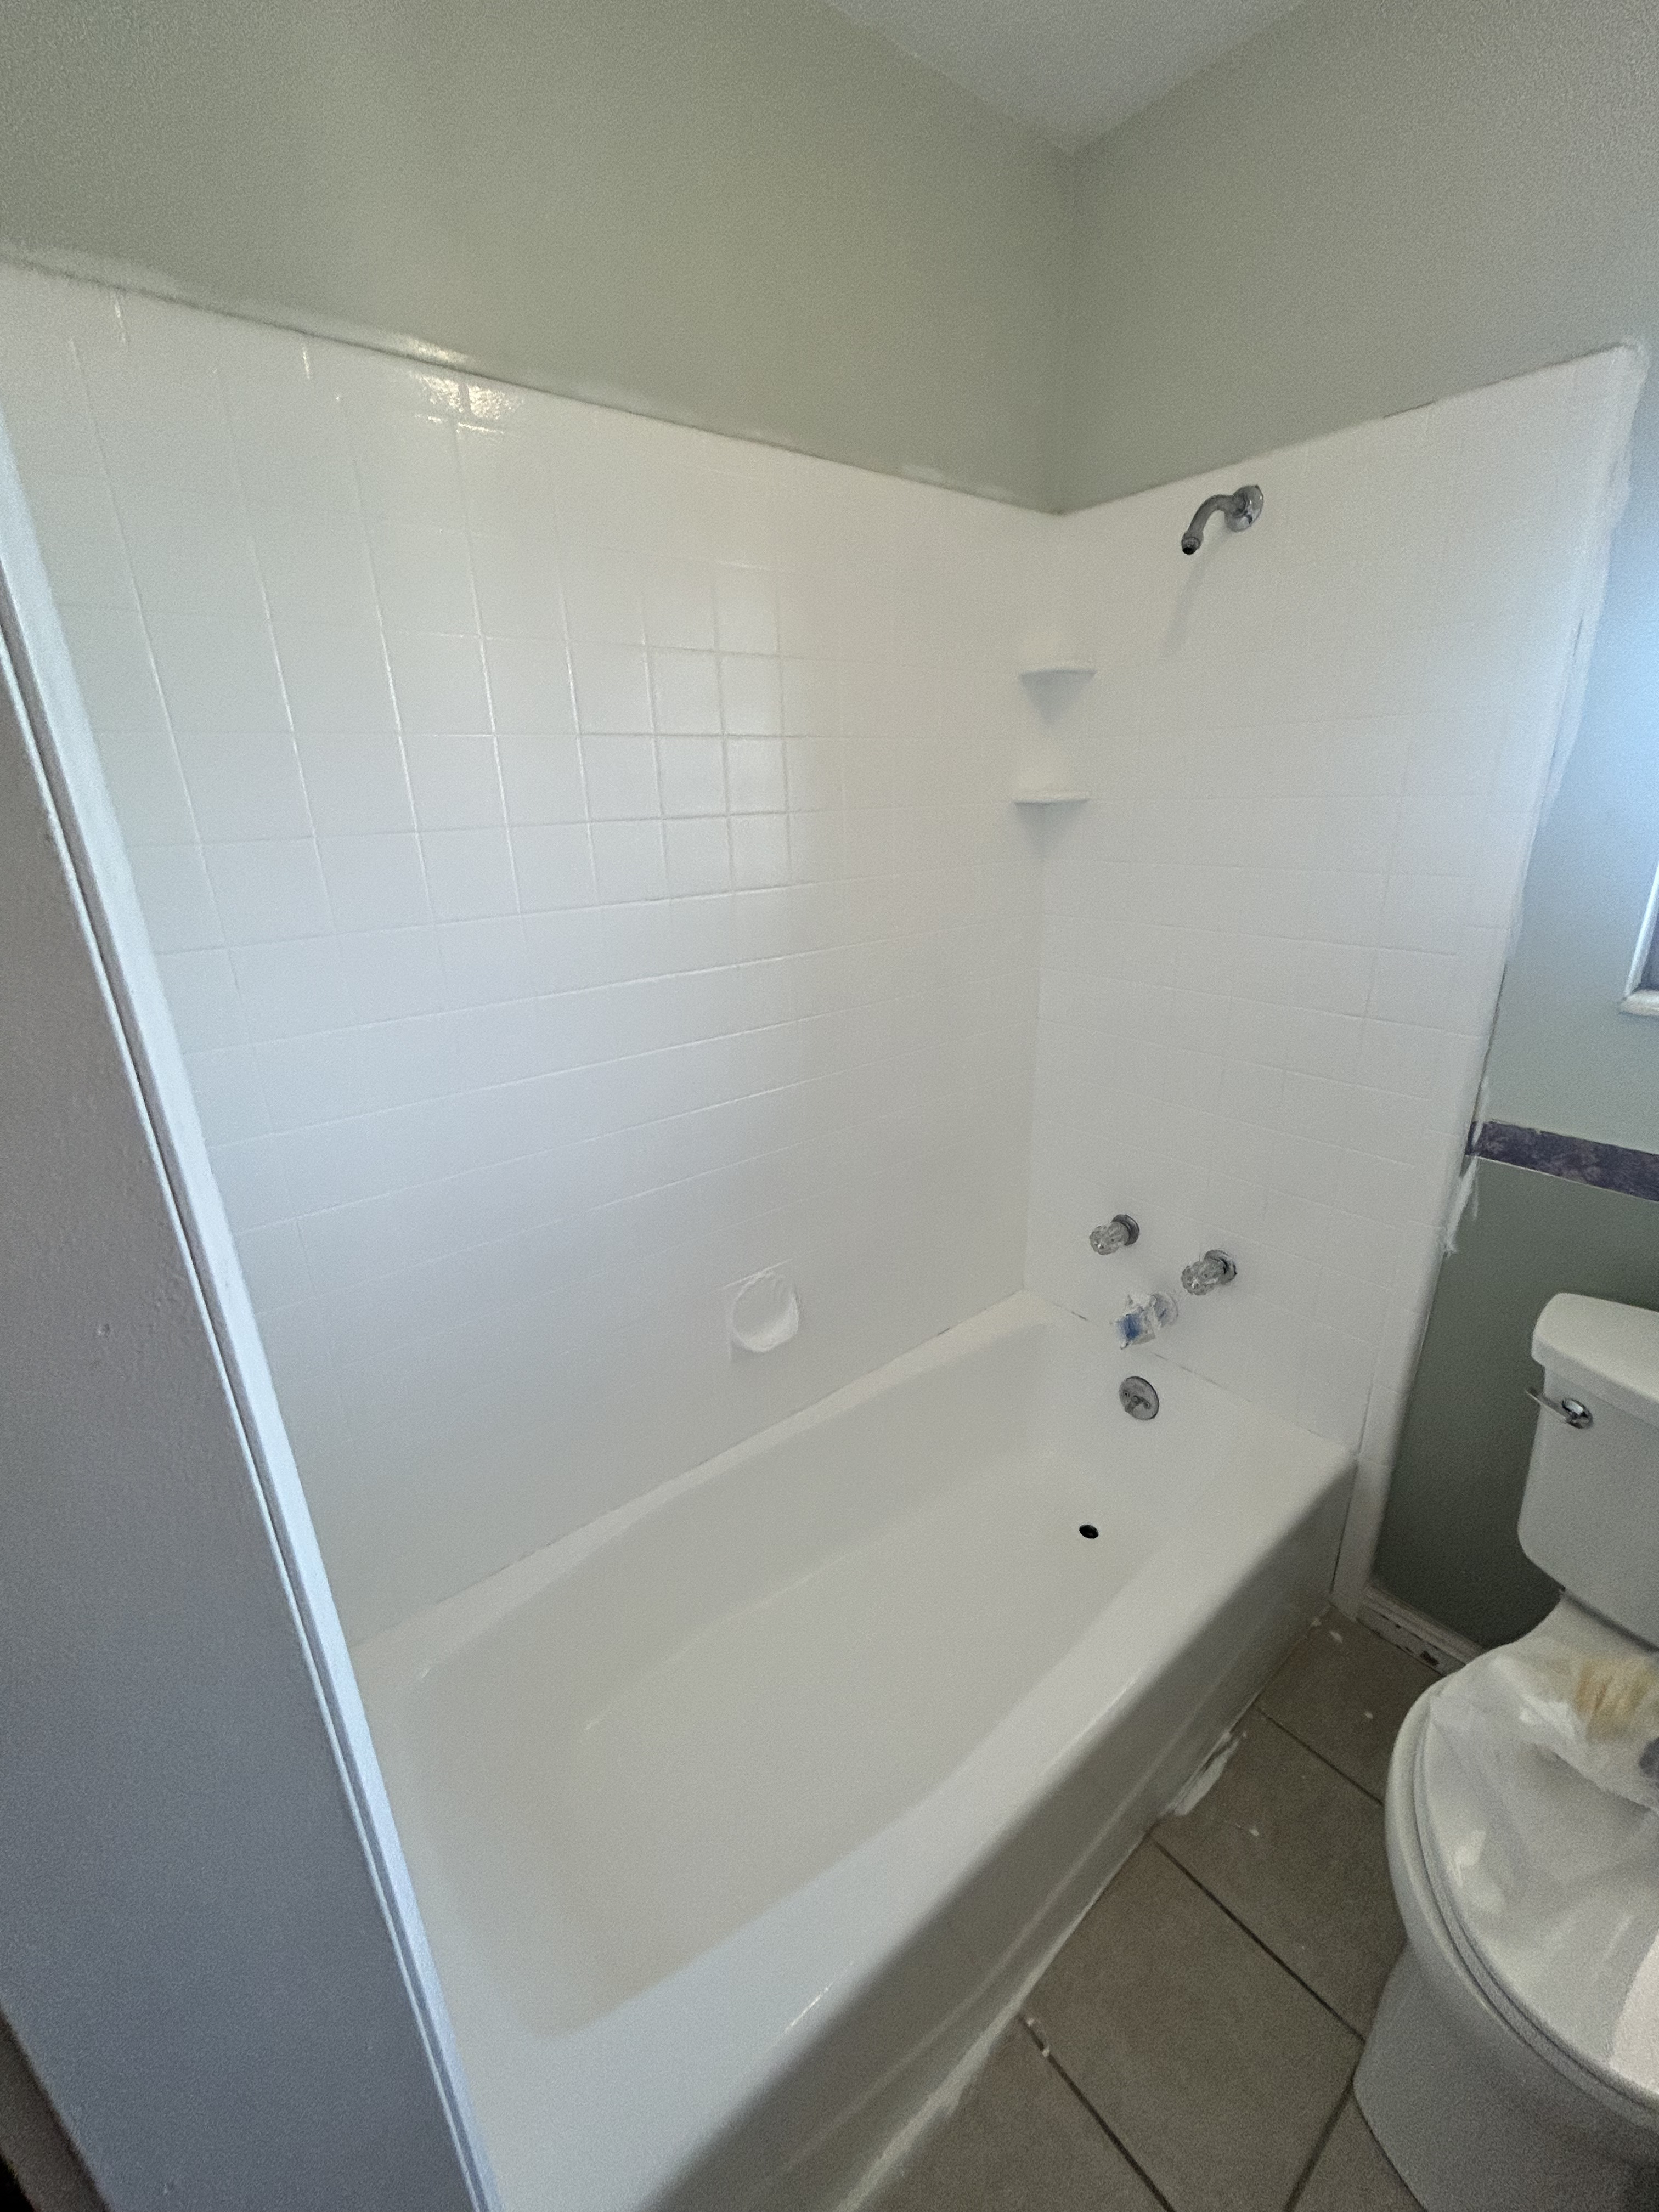
First, the before…
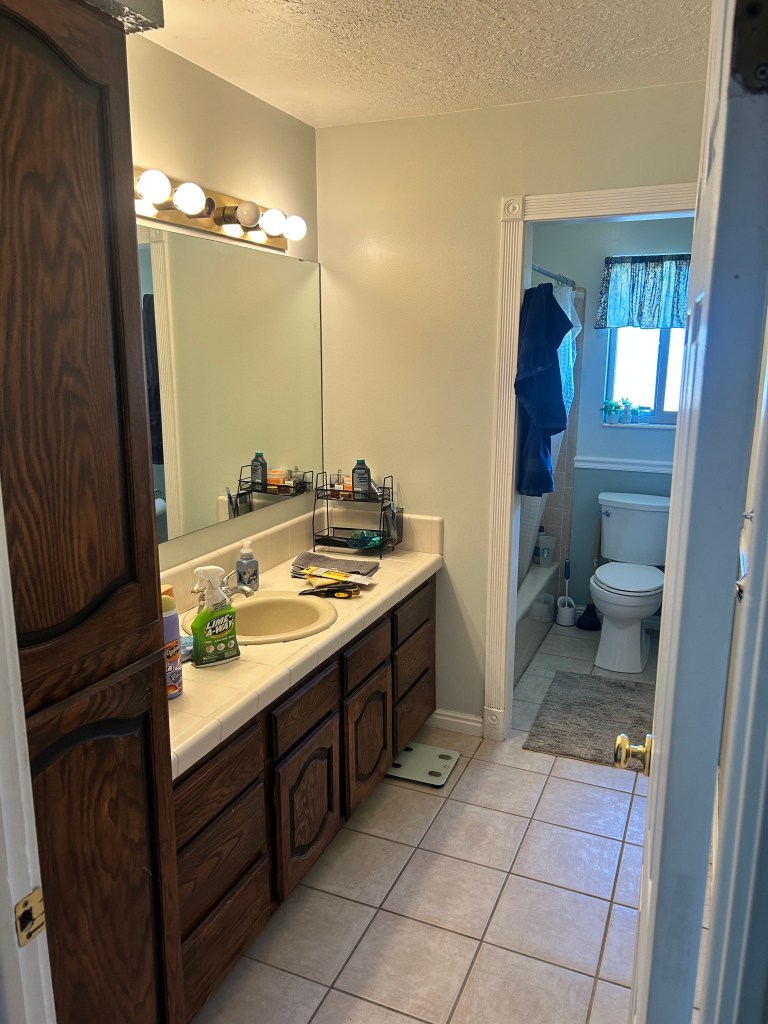
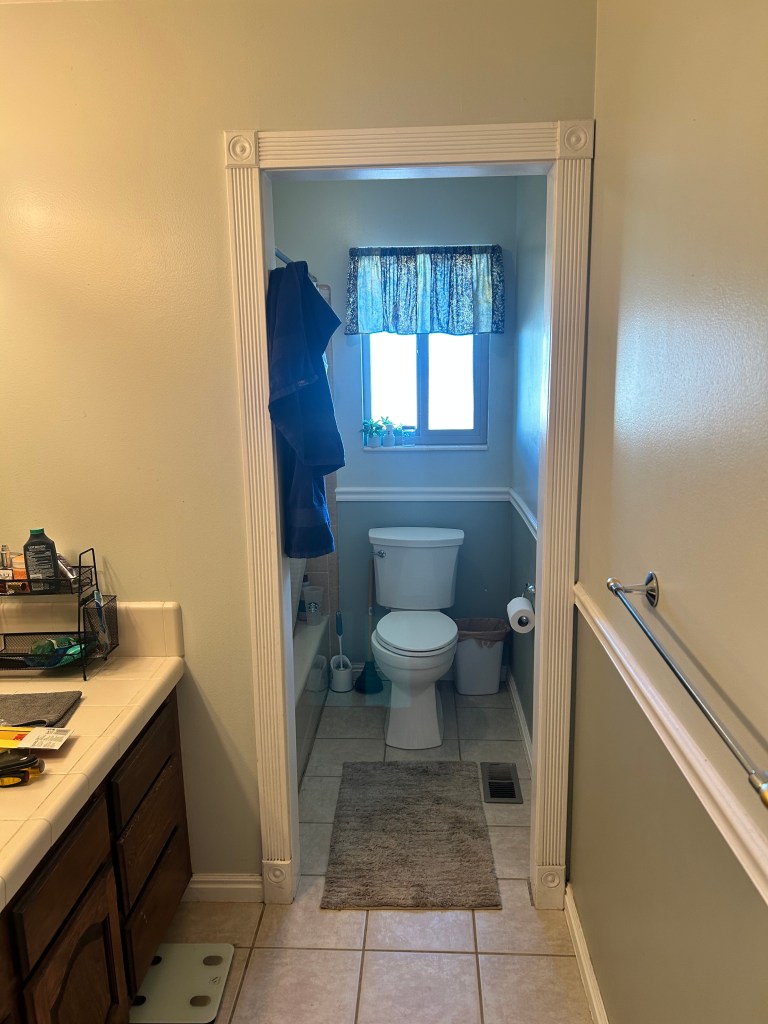
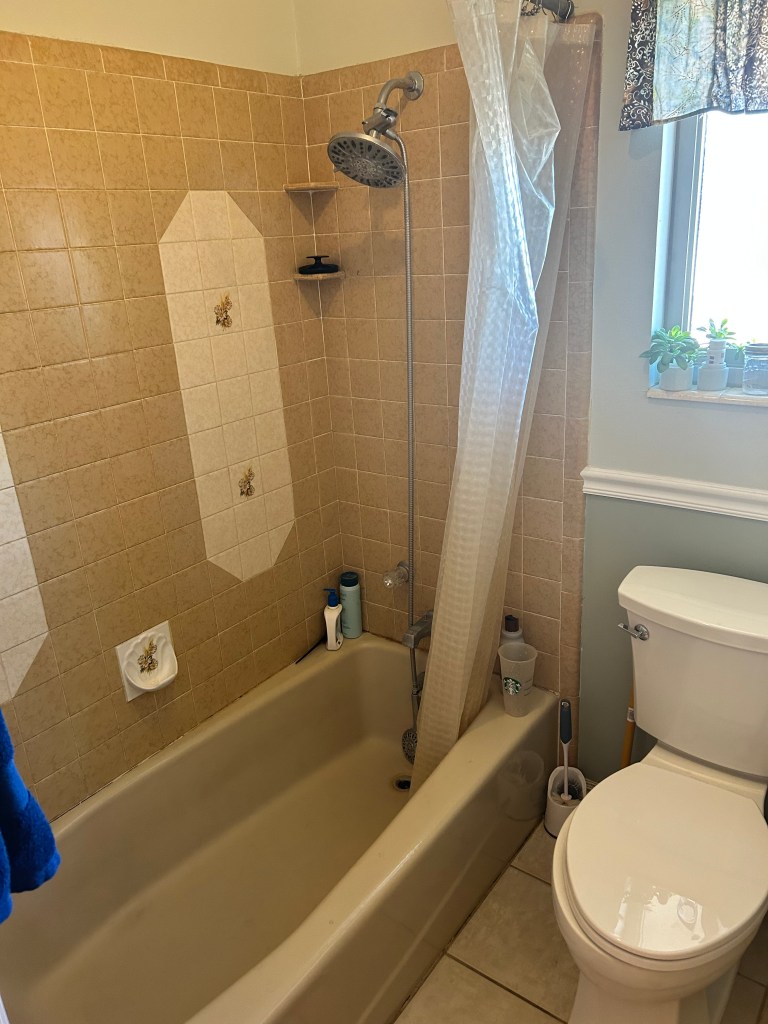
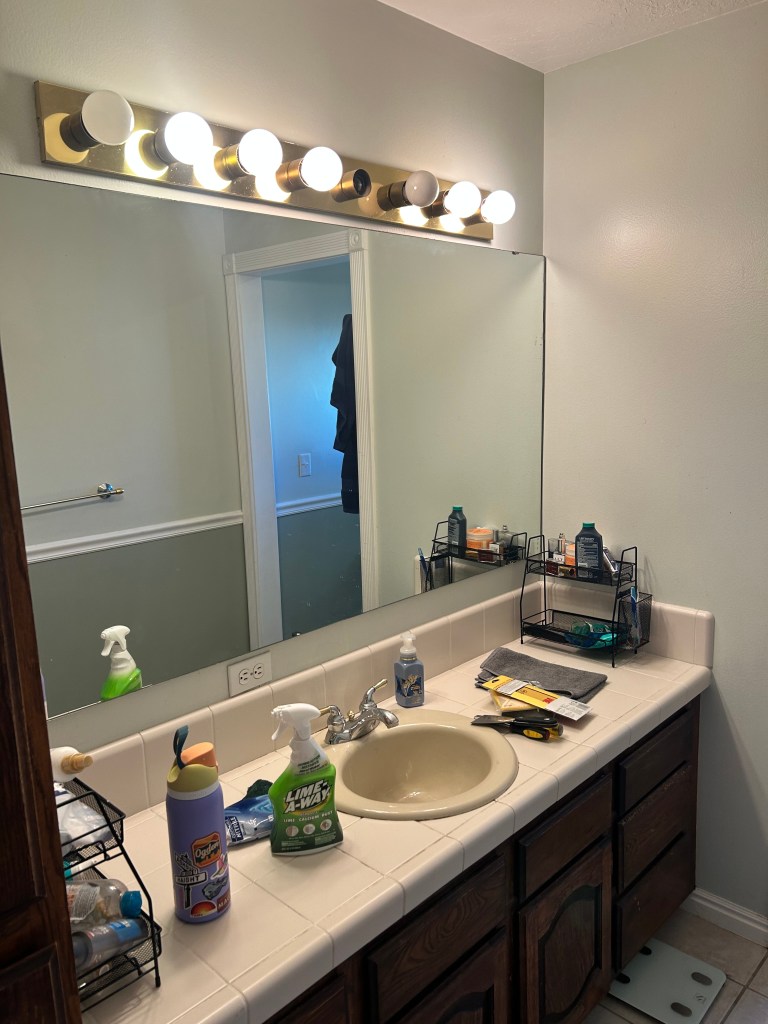
Sure, this ugly bathroom was functional… I mean, we could wash, brush and flush and, honestly, that’s what matters most. But the shower head was hanging limply at a weird, super-short height, and the nasty tile countertop was so low! It was only 30 inches from the floor, and while I’m sure that’s great for the vertically challenged, we are tall people around here!
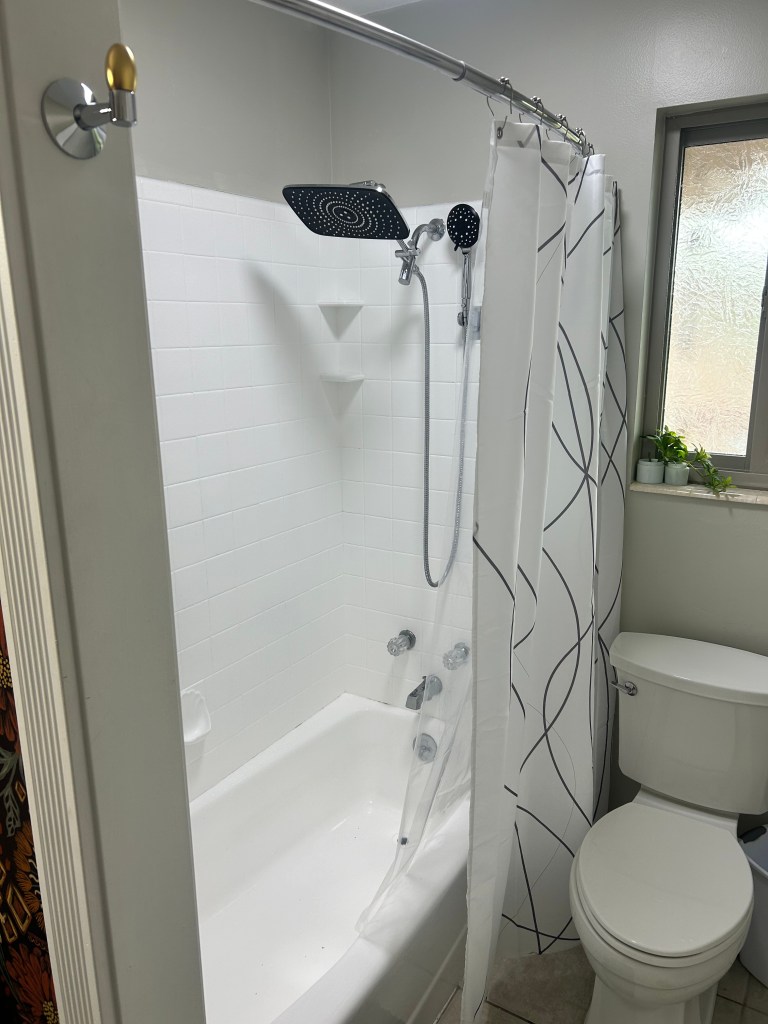
The magic that made this all possible came in a little box from Amazon. Did you know you can PAINT your tub and tile? Well, you can if you use this Rust-Oleum Tub and Tile Refinishing Kit. It’s amazing! My bathroom took 2.5 cans, but even still that is a fraction of what it would cost to replace it. And since it was all in excellent condition (other than being an ugly color), I just channeled my inner Joanna Gaines and donned my dystopian gas mask, then proceeded to sand and spray (repeat that for a total of 3 coats). I might have been able to get away with 2 coats, but that third one was definitely worth it.


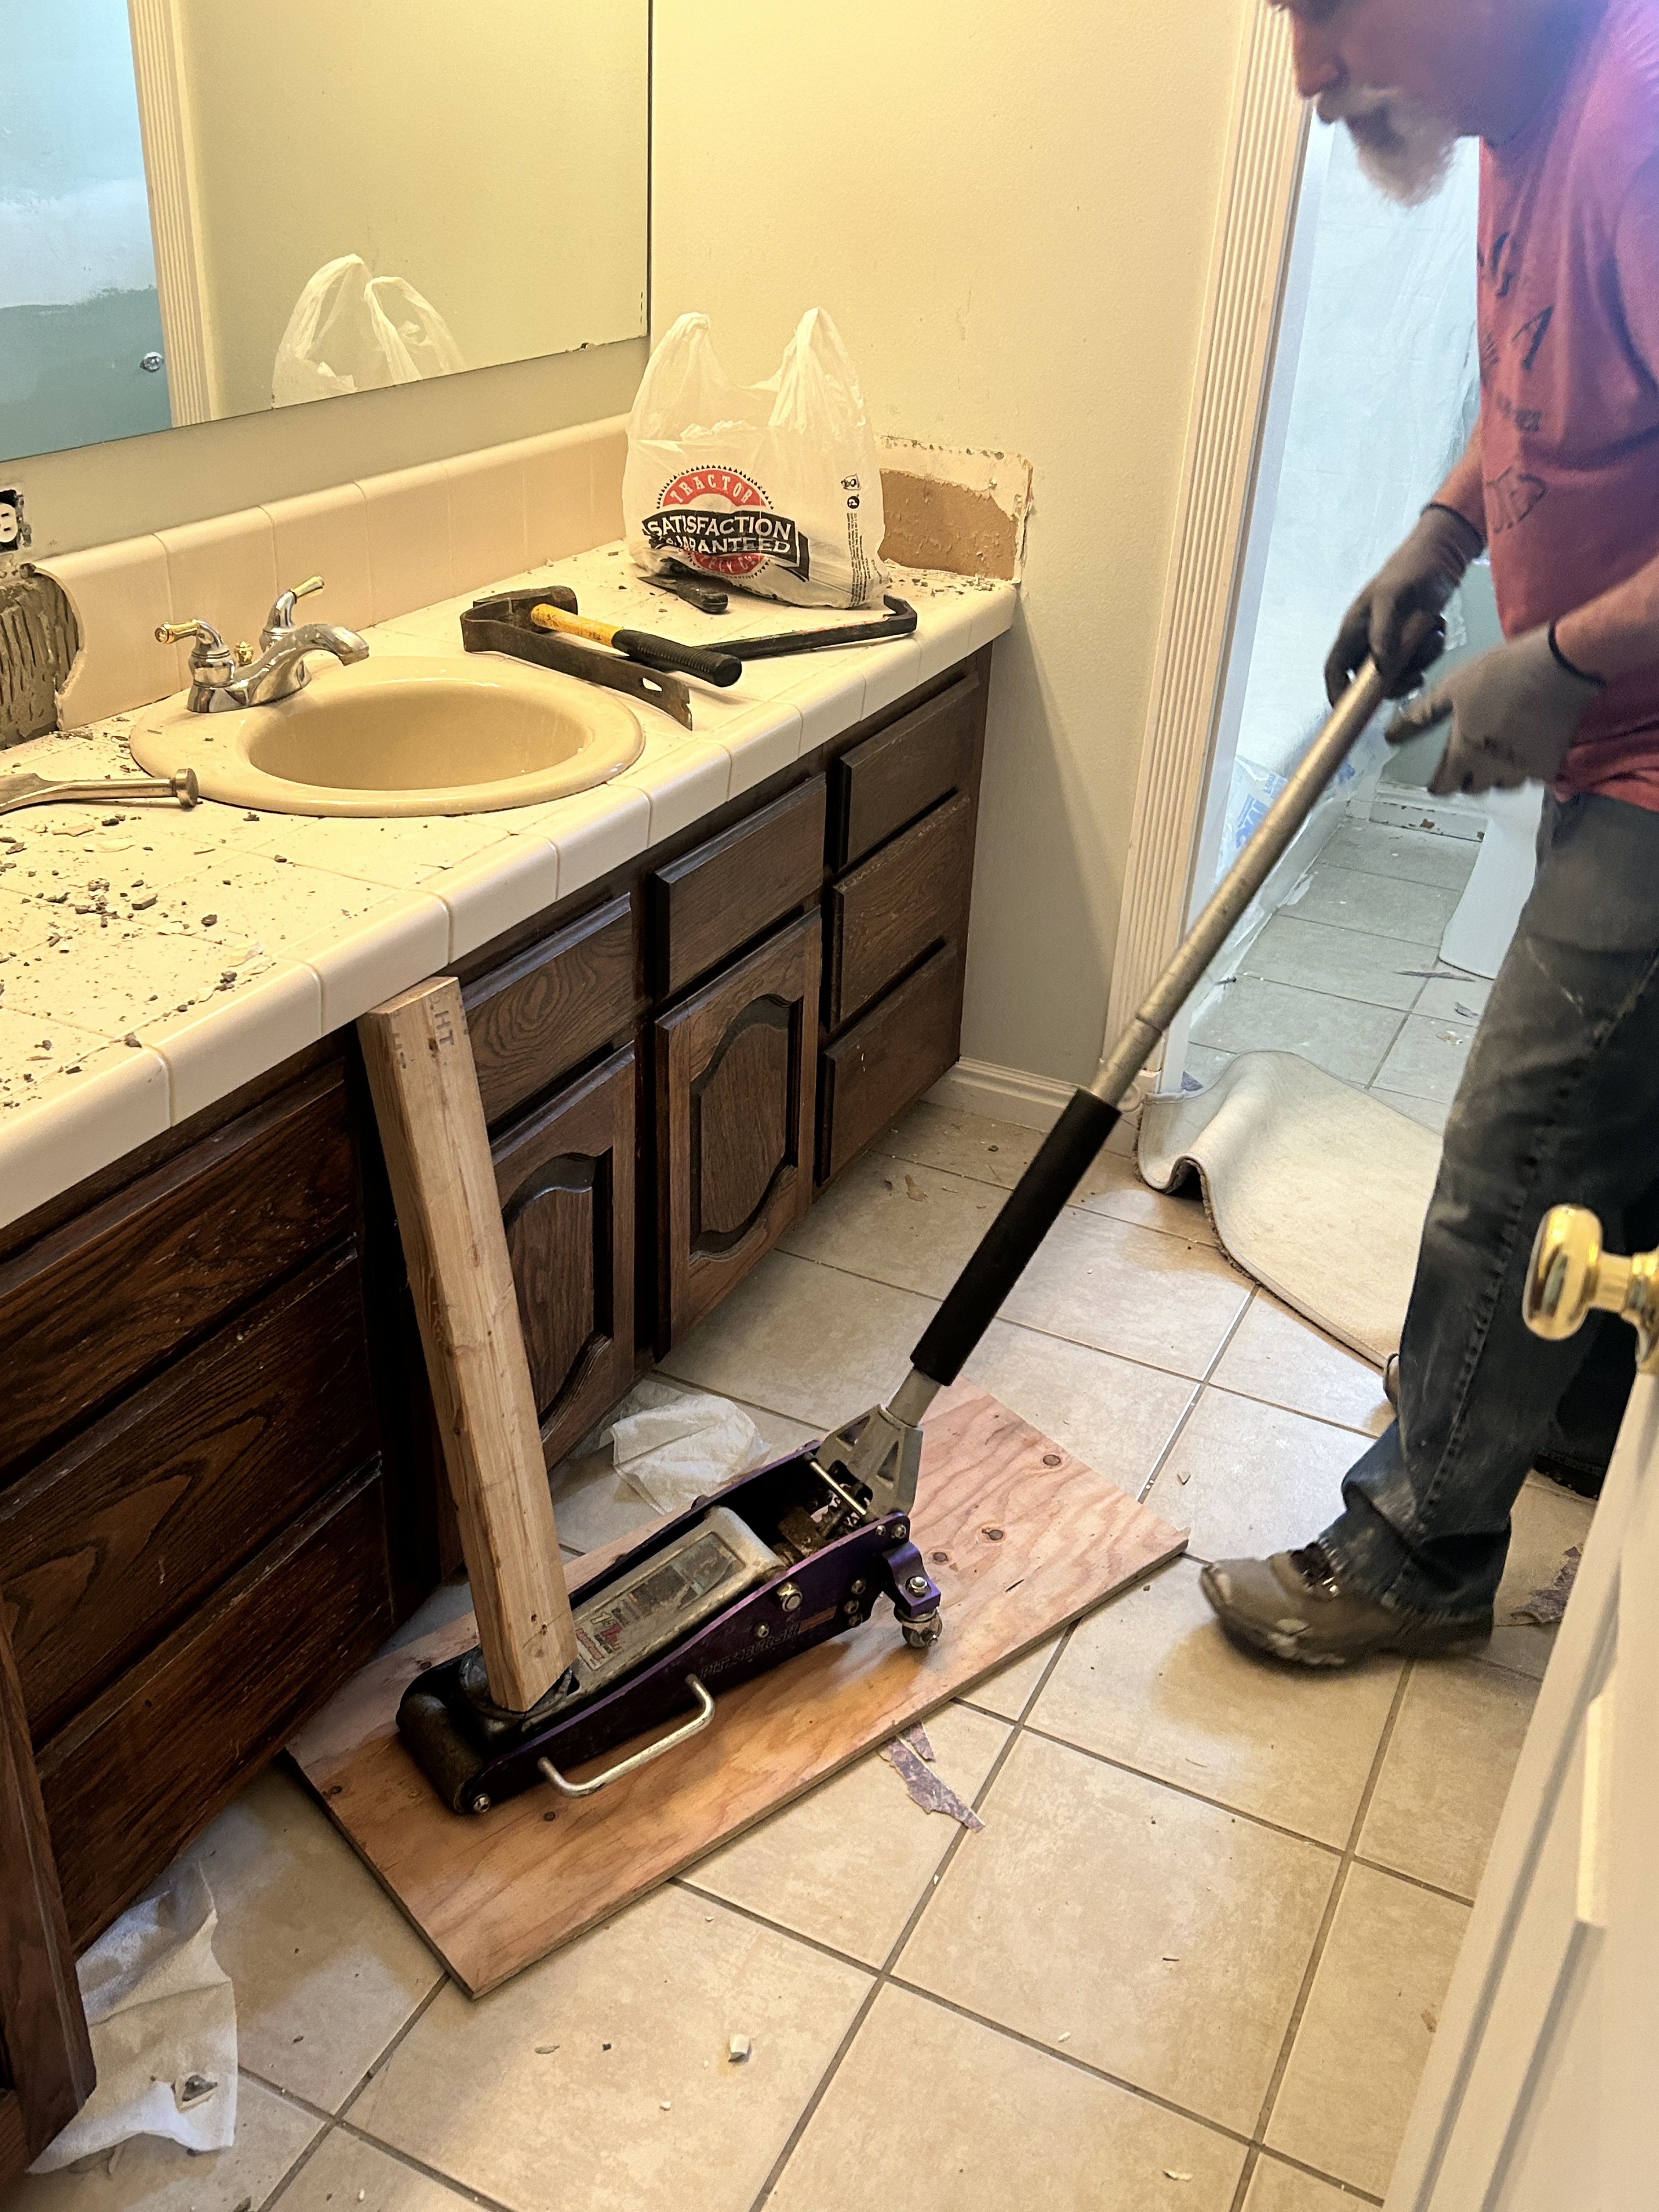
While the tub and tile were curing, we got busy with the rest of the room. First, I removed the lovely wooden chair rail that had graced this space for decades. Unfortunately, that left gaping holes in the walls. Luckily, I’m married to a guy who knows his way around a bucket of mud. While we were in demo mode, we also took a crack at removing that tiled countertop and figuring out a way to raise it up.
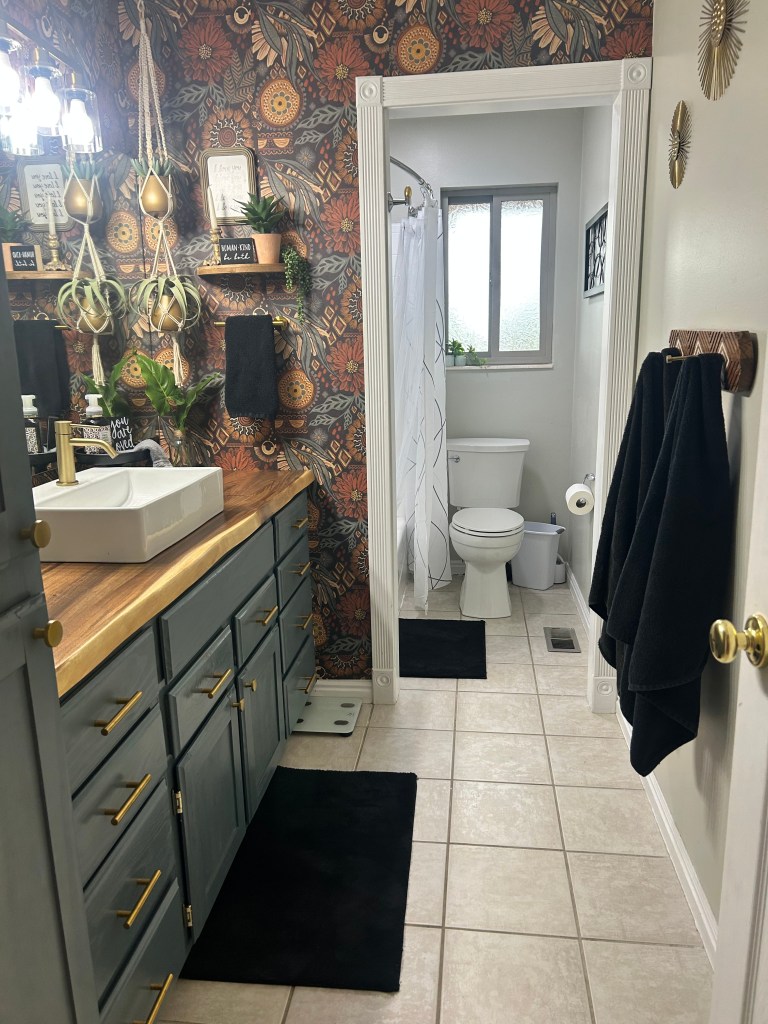
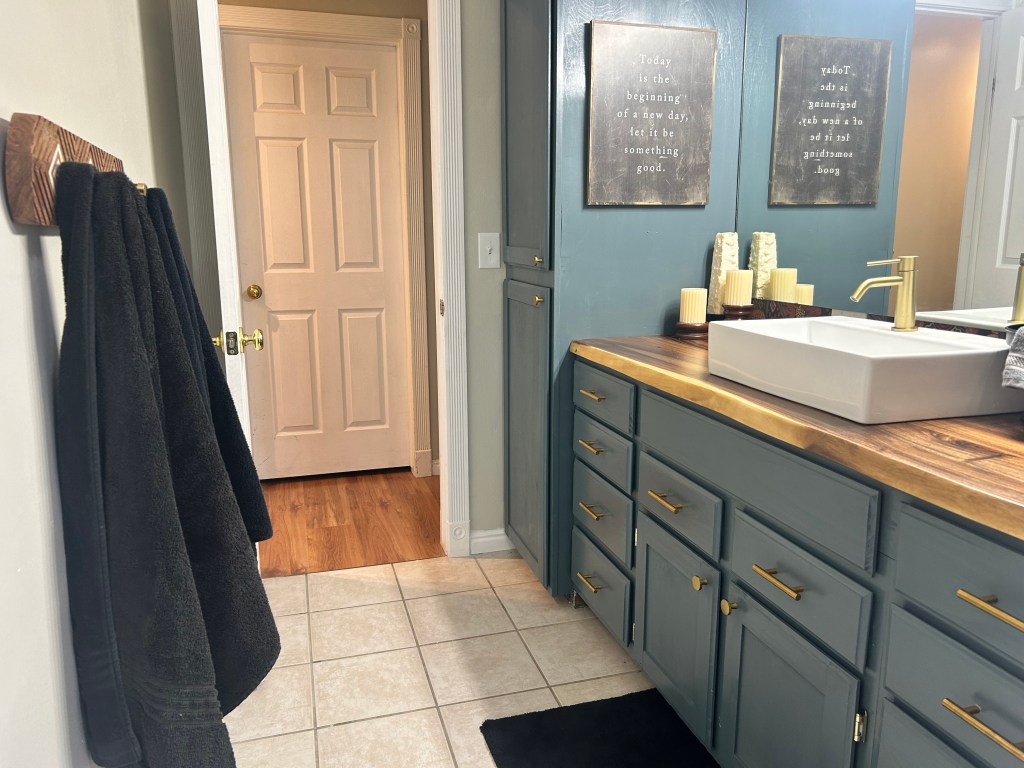
This guy is so handy! He got the floor jack and some 2x4s and before long, that nasty tile was just a memory. Then he built a box, complete with fake drawer fronts to raise the height of the counter to a standard 36 inches! I was super excited about that – no more folding myself in half to spit out the toothpaste.

Take a gander at those dated cupboard doors. They absolutely HAD to go! Mr. Handy made me four new doors and that completely changed the look of this enormous vanity and the attached linen cupboard.
You know what else Mr. Handy did? He found our spectacular live-edge countertop! My original plan was to use butcher block for the countertop, but on a trip to Home Depot to grab wood for the cupboards, he discovered that for just a little extra money, we could get a pre-finished slab of wood with a beautiful live edge. It was even more perfect than I could have imagined!
While he was busy in his workshop, I got busy painting. I went to Home Depot for a gallon of the wall color we’ve been using throughout this house. It’s Sherwin Williams Sedate Gray, and it’s perfect with all my earthy, moody colors. Luckily, that was the only paint I had to buy because I had a full quart of some mistinted cabinet paint from a previous project. Turns out, it was the perfect color for the vanity and linen cupboards!
I sure did keep the Amazon drivers busy! Nearly everything I got to finish off the bathroom and pull everything together came from Amazon, and I have it all linked below.
Don’t you just LOVE it when a plan comes together?

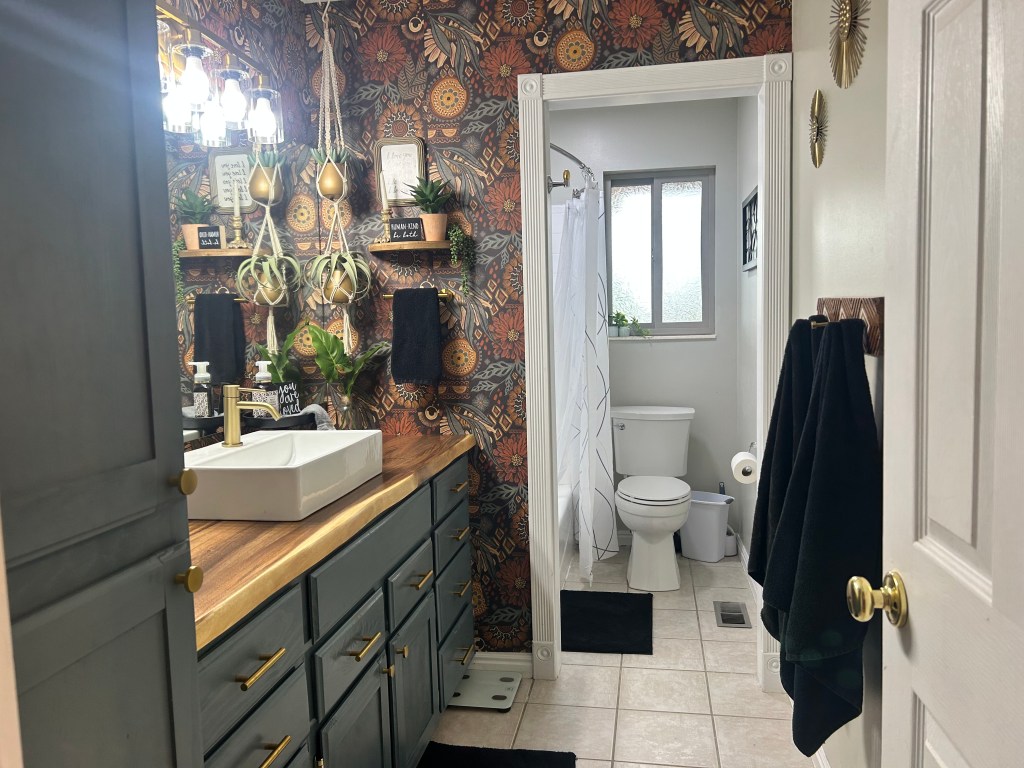
Wallpaper: Oh my goodness! This is what makes the entire room! It’s peel-and-stick, fully removable (ie: renter friendly), and so easy to use! The color was what caught my eye at first, but once it was up the pattern became everything – it’s so dramatic! I used three rolls of this Boho Brown Peach and Green wallpaper.
The vanity and linen cabinet needed updated pulls, so I found these round gold knobs, and these gold bar pulls and they absolutely POP against that green paint.
Of course, the crown jewel of the vanity is the white vessel sink with its gorgeous gold-tone faucet. And to make it all work, we had to buy this special drain for vessel sinks. To bring a little of that golden bling to the wall, I found this gold-tone towel bar. And topping it all off is this stunning gold light fixture that dazzles with its 5 light bulbs. It all looks so fabulous together!
The wall decor came from Hobby Lobby. I swear, every time I go there I wish I would have packed myself a snack. It truly takes me HOURS to wander the aisles repeatedly. I have to be sure I didn’t miss anything! It’s a treasure hunt, for sure, but I never leave that place disappointed.
Now, let’s take a peek into the shower area of the room so I can tell you about all the details here. And of course, it all came from Amazon!
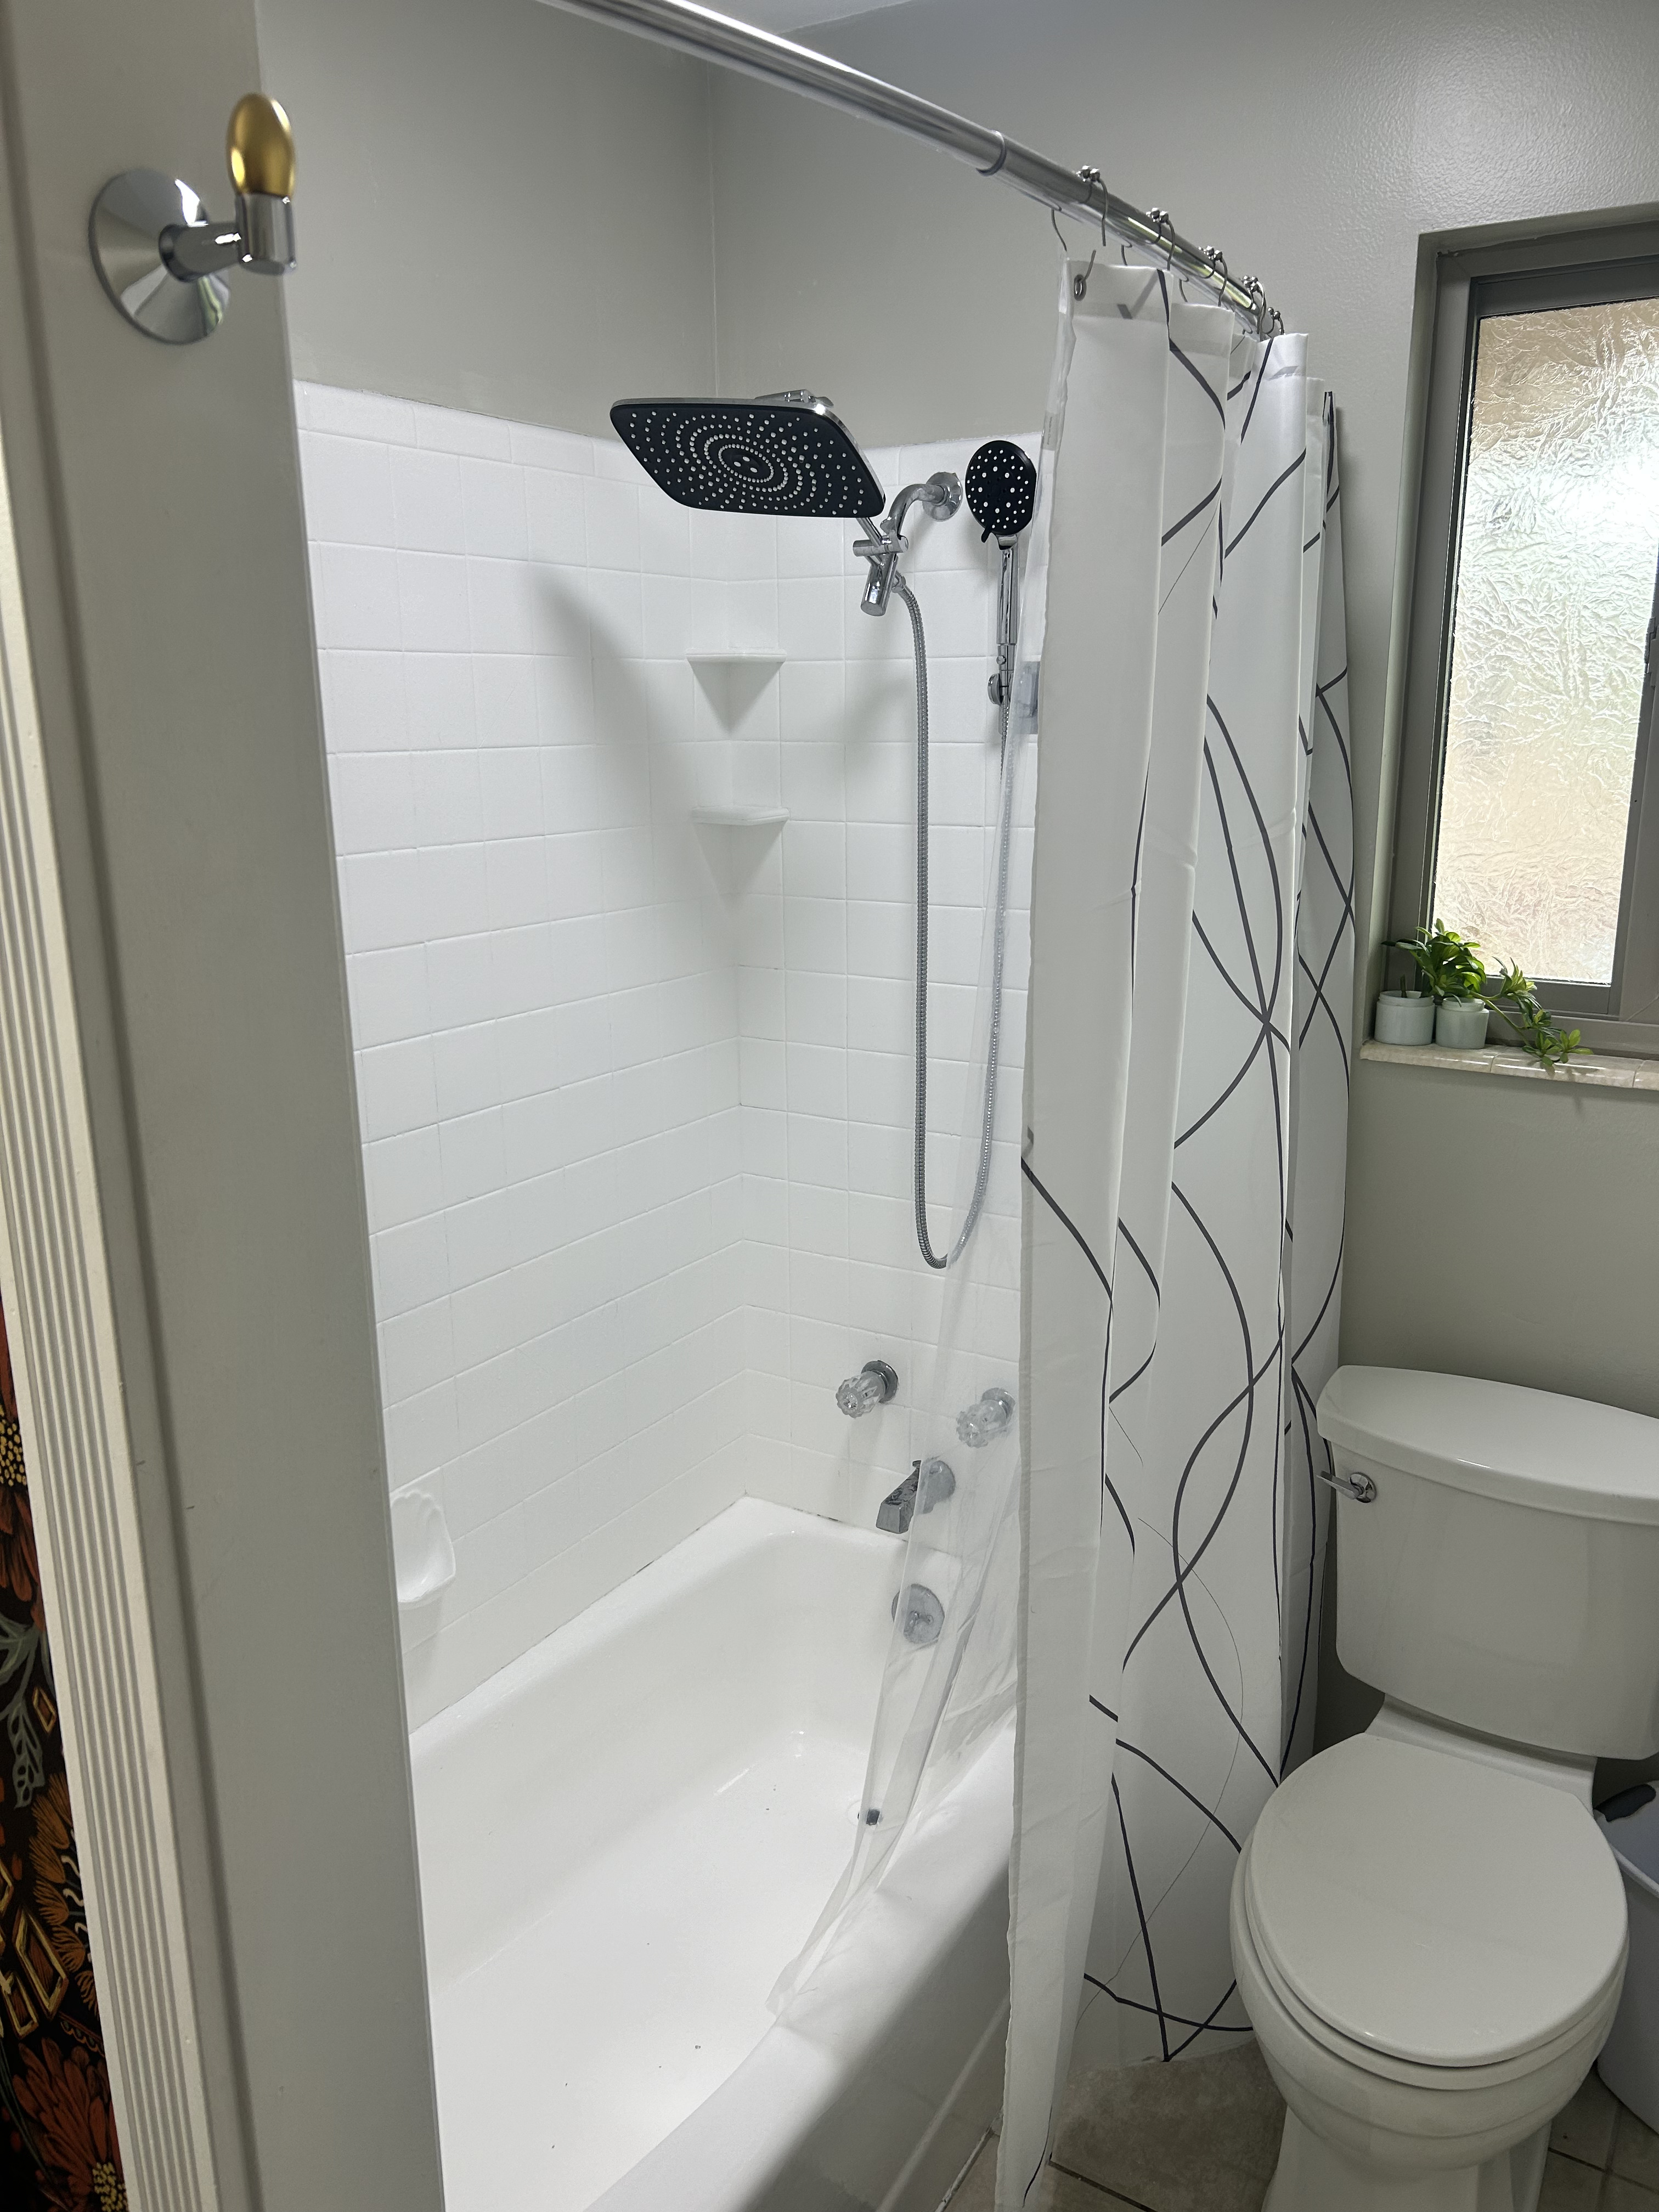
First of all, I knew I needed a phenomenal showerhead for my tall kids. This 12″ rain shower combo with an extension arm and handheld sprayer is perfect! I’m a firm believer in the curved, adjustable shower rod because it somehow makes the tub feel ten times roomier when you’re inside the curtain. Since the wallpaper is so busy, I wanted the shower curtain to be a little less in-your-face, and this rustic abstract cloth shower curtain was just perfect. I always like to add a vinyl shower curtain liner just to keep the cloth curtain looking its best. They are cheap and easy to replace once our hard water has done it’s worst.
Finally, although you can’t see it in the photo, I knew the shower needed way more storage than the two minuscule tile shelves that barely hold a shampoo bottle. This set of 3 shelves with organizers form a shower caddy like no other. It was easy to peel and stick them to the wall and they hold so much stuff!
Instead of paying THOUSANDS of dollars to completely remodel our bathroom, we ended up spending around $750 for everything to make this bathroom look like an entirely new space.
It all goes to show that if you’re willing to put in the hard work, and you have a great Amazon driver, you can accomplish anything you set your mind to!
Here’s one last collection of “After” photos. Feel free to scroll through and stare at them as much as you want. I know I can’t get enough of looking at them!
Oh, hey.
You’re still here?
Could you do me a little favor? Go follow me on TikTok? @ahilltophideaway
There’s a lot of diy, decor, crafts, and more. I’d love to have you follow along and see what else we’ve been up to as we remodel this entire 3200 square foot house.
Thanks!